Lithophane Maker (Photo to STL)
Pick a photo, set the size and thickness range, and download a watertight STL for your 3D printer. The photo never leaves your browser.
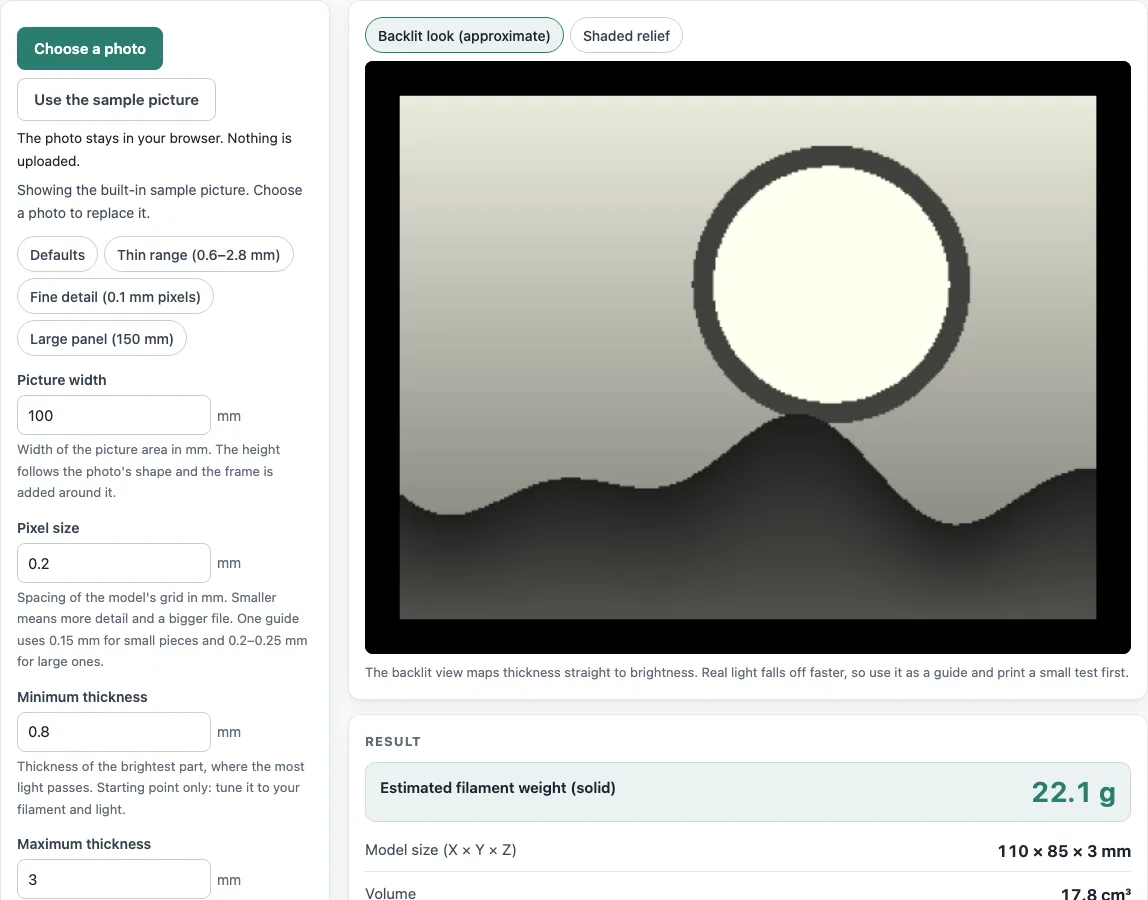
How to use the lithophane maker
- Click Choose a photo to load your own picture, or press Use the sample picture to try the tool first.
- Set Picture width between 10 and 300 mm. The height follows the photo’s aspect ratio.
- Set Pixel size between 0.05 and 1 mm. The default is 0.2 mm. One guide uses about 0.15 mm for small pieces and 0.2 to 0.25 mm for large ones.
- Set Minimum thickness and Maximum thickness. The maximum must be greater than the minimum.
- Set Frame width. Enter 0 for no frame.
- Move the Contrast and Brightness sliders if the picture looks too flat or too dark. Under More options you can change Greyscale conversion and Filament (for the weight).
- Tick Negative (bright parts thick) only if you want the bright areas to be thick.
- Check the preview. Switch between Backlit look (approximate) and Shaded relief to see the thickness map.
- Read the results: estimated filament weight, model size, volume, triangles, STL file size, grid and pixel size used.
- Click Download STL to save the file.
The presets Defaults, Thin range (0.6–2.8 mm), Fine detail (0.1 mm pixels) and Large panel (150 mm) fill in common settings for you. Copy link copies a URL that stores your settings, but not the picture. Print / save as PDF prints the preview, inputs and results with the date.
What thickness should a lithophane be?
The brightest pixel gets the minimum thickness, which defaults to 0.8 mm, and the darkest pixel gets the maximum, which defaults to 3 mm. These are adjustable starting points, not claims about what will print well on your machine. A guide from American Filament uses 0.6 mm and 2.8 mm for its filament, which is the Thin range preset. The tool calculates each pixel with this formula:
thickness = min + (1 − brightness) × (max − min)
Dark pixels are thick and bright pixels are thin, so light passes mostly through the bright areas when the panel is backlit. The frame is set at the maximum thickness.
Before the thickness is calculated, each pixel is converted to greyscale. The default is Rec. 709 weights (0.2126 R + 0.7152 G + 0.0722 B). You can switch to Rec. 601 weights (0.299 R + 0.587 G + 0.114 B). Transparent pixels count as white, so they become thin. Contrast and brightness then adjust the greyscale value:
g’ = clamp((g − 0.5) × contrast + 0.5 + brightness, 0, 1)
What is a negative lithophane?
A negative lithophane reverses the mapping, so bright parts are thick and dark parts are thin. In this tool, tick Negative (bright parts thick). The formula becomes thickness = min + brightness × (max − min), with the same limits. Leave it off for a normal photo lit from behind, and check the preview before you print.
How much filament does a lithophane use?
The results show the estimated weight for a solid print, using the density of the filament you pick (PLA 1.24 g/cm³ by default). It depends on the picture, because darker pictures are thicker. With the built-in sample picture and the defaults (100 mm wide, 0.2 mm pixels, 5 mm frame), the model is 110 × 85 × 3 mm, 473,348 triangles, a 23.7 MB file and about 22.1 g of PLA. At 50 mm wide with 0.15 mm pixels it is about 59.9 × 47.4 mm and 7.4 g.
The file is capped at 1,000,000 triangles. If your pixel size would go over that, the tool raises it and shows a warning. Set the size here rather than in your slicer, because scaling the STL also scales the thickness.
Sources
Checked October 2026:
- Greyscale weights: Rec. 709 and Rec. 601 luma coefficients, Wikipedia: Luma (video)
- Binary STL layout (80-byte header, triangle count, 50 bytes per triangle, right-hand-rule vertex order): Wikipedia: STL (file format)
- Starting values and print notes (0.15 mm pixels, 0.6 mm minimum thickness, 2.8 mm maximum for their filament, 5 mm frame, 0.12 mm layers, calibration tower, no difference between 99 %, 100 % and thick walls): American Filament, Beginner’s Guide to Printing Lithophanes
- Vertical orientation, brim, white PLA or PETG, 99 % infill with extra shells: 3D Insider, Best Settings for 3D Printing Lithophanes
- PLA density 1.24 g/cm³: Ultimaker PLA data sheet
For estimation; the thickness values are starting points, so print a small test with your own filament and light.
Frequently asked questions
Is the lithophane maker free, and is my photo uploaded?
It is free, with no sign-up. The tool runs entirely in your browser. The photo you choose is decoded locally, and nothing is uploaded.
Does the lithophane need a frame?
No. A frame is optional: set Frame width to 0 for no frame. The default is 5 mm. The frame is a flat border at the maximum thickness, and it adds to the total model size.
How do I print a lithophane, vertical or flat?
One guide stands the panel on its edge and adds a brim. Print a small test or thickness tower before the full panel. The tool shows printing notes from public guides under the results.
What filament is best for a lithophane?
PLA is the default in the tool, and white PLA is the usual choice. One guide notes that white PETG also works. The weight estimate changes with the filament you select under More options.
What file format does the lithophane maker export?
It exports a binary STL file. The surface is closed and watertight, with a top heightmap, a flat back and four side walls.
Can I use the STL for commercial purposes or sell lithophanes?
Yes. The STL you make from your own photo is yours to use, including for selling prints, royalty-free and with no attribution. Make sure you have the right to use the photo itself. The only limit is that you should not rebuild this generator as a competing service.
Related tools
- Filament calculator: estimate filament use for a print beyond the lithophane.
- 3D printing cost calculator: work out the cost of printing your lithophane.
- 3D print time calculator: estimate how long a panel will take to print.
- Plastic density chart: compare the density of different plastics.
- All calculators: browse every calculator on this site.